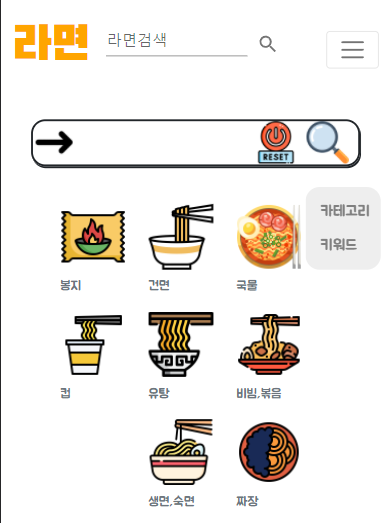
Mui 컴포넌트 style설정하는법,
텍스트 Area 사이즈를 조정하고 싶다거나, Margin을주고싶다거나 할때
style={{ width: 200 }}속성을 사용해주면 된다.
<TextField
                  style={{ width: 150 }}
                  id="standard-search"
                  label="라면검색"
                  defaultValue={search}
                  type="search"
                  variant="standard"
                  color="warning"
                  onChange={handleChange}
                  // onChange={(event)=>{setSearch(event.target.value)}}
                  onKeyPress={(e) => {
                    if (e.key === "Enter") {
                      router.push(
                        {
                          pathname: "/SearchTextResult",
                          query: {
                            textResult: search,
                          },
                        },
                        `/SearchTextResult`
                      );
                    }
                  }}
                />
이와같이 텍스트필드 사이즈를 조절할때 위와같이 style={{width:150}}으로 사용해 주었고
<IconButton
                style={{ marginBottom: 25 }}
                  type="submit"
                  sx={{ p: "10px" }}
                  aria-label="search"
                  onClick={() => {
                    router.push(
                      {
                        pathname: "/SearchTextResult",
                        query: {
                          textResult: search,
                        },
                      },
                      `/SearchTextResult`
                    );
                  }}
                >
                  <SearchIcon />
                </IconButton>
위의 이미지에서 돋보기 버튼이 좀 내려와서 균형이 안맞아서 위로 올려주려고
marginBottom으로 넣어줬다. 속성이름은 카멜케이스로 넣어주면된다.
style = {{marginBottom:25}}와같이 넣어주었다.
- 참고한링크
'React' 카테고리의 다른 글
| axios 여러개 요청하기 (멀티 리퀘스트) (0) | 2022.04.02 |
|---|---|
| useWindowSize Hook, 반응형 NavBar,Footer (0) | 2022.04.02 |
| handlechange 사용 (1) | 2022.03.25 |
| React 페이지네이션 구현하기 (Mui이용) (0) | 2022.03.25 |
| 엔터키 이벤트(onKeyPress) 혹은 특정키 이벤트 (0) | 2022.03.25 |


