https://docs.openvidu.io/en/stable/cheatsheet/send-messages/
Send text messages - OpenVidu Docs
From here you can search these documents. Enter your search terms below.
docs.openvidu.io
위의 문서를 참고했다.
프로젝트가 영상채팅에 관한내용인데 openvidu를 활용해 구현했다.
거두절미하고 유저간 귓말기능 구현이 필요했다.
귓말 기능을 쓴다기보단, signal을 사용해 게임 트리거를 구현하려고했는데
그러면 특정상대방에게 특정 이벤트를 발생시켜야만 했다. 마피아 게임과도 유사하지만
그보단 단순한 로직의 라이어게임을 구현하는건데 여튼..! 처음에는 채팅으로만 가능할까하다가
생각해보니 특정 시그널만 받아서 작동시키면 각자 화면에서 컴포넌트를 함수형태로 발생시키는거라
잘만하면 될것같았다.
그 와중에 난관에 부딪힌게 어떻게 만들것인지..!
결국 위의 링크에서 중요한건 아래파트였다.
You can send messages to specific users adding to to array the proper Connection objects:
// Sender of the adressed message (after calling 'session.connect')

session.signal({
    data: 'My private custom message',
    to: [connection1, connection2],
    type: 'my-private-chat'
});
In this last case, only participants represented by connection1 and connection2 objects will receive the signal event (only if they are subscribed to it!). You can get Connection objects by subscribing to connectionCreated event before connecting to a session:
this.session.on('connectionCreated', (event) => {
    console.log(event.connection);
});
dㅇㅇ
바로위에 connectionCreated를 포함한 코드를 전부 넣어줘야 했고 바로위의 to: [],연결된 배열안에는
참여한 유저들의 connection을 넣어줘야했다. 중요한건 단순히 하나의 데이터가아닌 object형태로 넣어줘야
하는것이었다. 하... 구현되는순간 얼마나 뿌듯했는지 모른다.
joinSession부분의 코드만 가져왔다.
1. 코드넣는 위치도 중요했다. join하는순간 처음에 넣어줘야했다.
2.그리고 그안에 새로운 변수를 만들어 복사하는 형식으로 setState로 배열에 자료를 넣어주고
3.그 저장해놓은 자료들을 토대로 사용해
session.signal({
    data: 'My private custom message',
    to: [connection1, connection2],
    type: 'my-private-chat'
});
이와같이 session.signal에서 to안에 object형태로 넣어줘야했다.
joinSession() {
// --- 1) Get an OpenVidu object ---
this.OV = new OpenVidu();
// --- 2) Init a session ---
this.setState(
{
session: this.OV.initSession(),
},
() => {
var mySession = this.state.session;
// --- 3) Specify the actions when events take place in the session ---
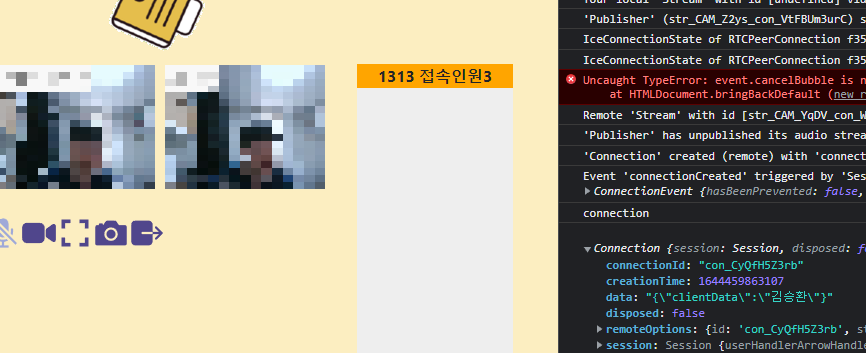
mySession.on("connectionCreated", (event) => {
console.log("connection");
console.log(event.connection);
// var connection = event.connection.connectionId
// Object형을 넣어줘야한다.
var connection = event.connection;
var connectionUser = this.state.connectionUser;
connectionUser.push(connection);
//Update
this.setState({
connectionUser: connectionUser,
});
});
// On every new Stream received...
mySession.on("streamCreated", (event) => {
// Subscribe to the Stream to receive it. Second parameter is undefined
// so OpenVidu doesn't create an HTML video by its own
var subscriber = mySession.subscribe(event.stream, undefined);
var subscribers = this.state.subscribers;
subscribers.push(subscriber);
// Update the state with the new subscribers
this.setState({
subscribers: subscribers,
});
});
mySession.on("signal:chat", (event) => {
let chatdata = event.data.split(",");
if (chatdata[0] !== this.state.myUserName) {
this.setState({
messages: [
...this.state.messages,
{
userName: chatdata[0],
text: chatdata[1],
chatClass: "messages__item--visitor",
},
],
});
}
});
mySession.on("signal:captureSignal", (event) => {
this.onCapture();
});
// On every Stream destroyed...
mySession.on("streamDestroyed", (event) => {
// Remove the stream from 'subscribers' array
this.deleteSubscriber(event.stream.streamManager);
});
// On every asynchronous exception...
mySession.on("exception", (exception) => {
console.warn(exception);
});
// --- 4) Connect to the session with a valid user token ---
// 'getToken' method is simulating what your server-side should do.
// 'token' parameter should be retrieved and returned by your own backend
this.getToken().then((token) => {
// First param is the token got from OpenVidu Server. Second param can be retrieved by every user on event
// 'streamCreated' (property Stream.connection.data), and will be appended to DOM as the user's nickname
mySession
.connect(token, { clientData: this.state.myUserName })
.then(() => {
// --- 5) Get your own camera stream ---
// Init a publisher passing undefined as targetElement (we don't want OpenVidu to insert a video
// element: we will manage it on our own) and with the desired properties
let publisher = this.OV.initPublisher(undefined, {
audioSource: undefined, // The source of audio. If undefined default microphone
videoSource: undefined, // The source of video. If undefined default webcam
publishAudio: true, // Whether you want to start publishing with your audio unmuted or not
publishVideo: true, // Whether you want to start publishing with your video enabled or not
resolution: "640x480", // The resolution of your video
frameRate: 30, // The frame rate of your video
insertMode: "APPEND", // How the video is inserted in the target element 'video-container'
mirror: false, // Whether to mirror your local video or not
});
// --- 6) Publish your stream ---
mySession.publish(publisher);
// Set the main video in the page to display our webcam and store our Publisher
this.setState({
mainStreamManager: publisher,
publisher: publisher,
});
})
.catch((error) => {
console.log(
"There was an error connecting to the session:",
error.code,
error.message
);
});
});
}
);
}이상 다시봐도 할 수 있을거같다. 언젠가 쓸 일이 있을까? 싶지만 이글을 기록한건 다름아니라
문제 해결하는 과정이 인상 깊었기 때문이다.
거의 3시간을 가까이 알아보고 공부하고 시도하다가 되었는데 다음에는 시행착오를 겪었으니
비슷한 상황에 좀더 빠르게 해결 할 수 있을거같다.
이런건 공식문서의 설명을 하나도 놓치지 않는게 중요했다.
포인트는
1.설명 그대로 해볼것
2.다시 자세히봐서 '그냥자료가아니라' 'object'라고한걸 놓치지말고 봤어야했다.
3.그리고 역시 구글검색의 생활화!
4.브라우저에서 console.log로 잘찍어보면서 개발자모드를 활용하기
'웹개발정보' 카테고리의 다른 글
| Mui Appbar Link설정하기 (0) | 2022.03.17 |
|---|---|
| 깃랩에서 깃허브로 이사하기 (0) | 2022.03.02 |
| 웹디자인 관련 추천사이트 (0) | 2022.02.10 |
| 브라우저에 데이터를 저장하는 방법 (0) | 2022.02.04 |
| openvidu 튜토리얼 설치하기 (0) | 2022.02.03 |

